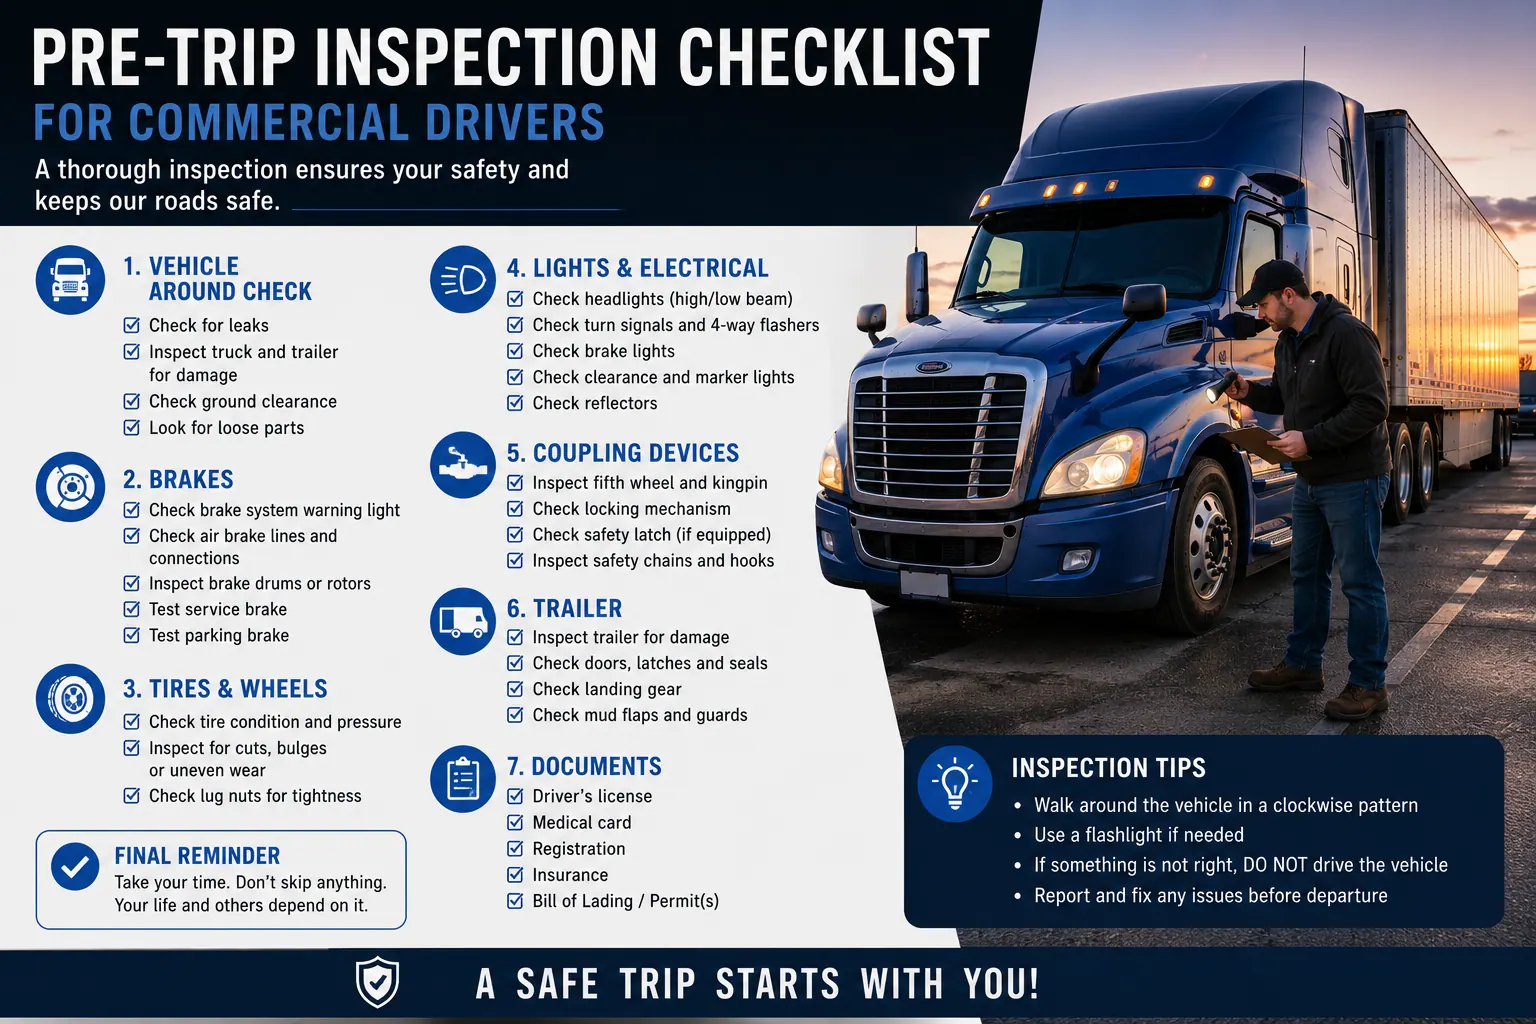
Pre-Trip Inspection Checklist for Commercial Drivers
A pre-trip inspection is one of the most important safety procedures a commercial driver performs each day. It helps identify mechanical problems before they cause a breakdown, roadside violation, cargo damage, or serious accident.
Under 49 CFR § 396.13, a driver must be satisfied that a commercial motor vehicle is in safe operating condition before driving it. Federal regulations also prohibit operating a CMV unless essential equipment—including brakes, steering, lights, tires, coupling devices, and emergency equipment—is working properly.
A consistent inspection routine can help drivers protect themselves, their cargo, and everyone else on the road.

Why Is a Pre-Trip Inspection Important?
A pre-trip inspection is not simply a test that drivers complete when obtaining a CDL. It is an essential part of professional vehicle operation.
A proper inspection can help you:
- Discover mechanical defects before departure;
- Reduce the risk of crashes and breakdowns;
- Avoid preventable roadside violations;
- Protect the vehicle and cargo;
- Report maintenance problems promptly;
- Confirm that the truck is safe to operate.
The Federal Motor Carrier Safety Administration states that drivers must inspect their vehicles before operating them and be satisfied that they are in safe working condition.
Drivers should follow their company procedures as well as federal, state, and local requirements. The exact checklist may differ depending on whether the vehicle is a tractor-trailer, straight truck, tanker, flatbed, passenger vehicle, or another type of CMV.
1. Review the Previous Inspection Report
Before walking around the vehicle, review the previous Driver Vehicle Inspection Report when one is available.
Check whether:
- Any defects were reported;
- Required repairs were completed;
- A mechanic certified the repairs;
- The vehicle was approved for operation;
- Any unresolved issue could affect safety.
Under 49 CFR § 396.13, a driver must review the last vehicle inspection report when one is required and sign it if defects were reported and repaired or certified as unnecessary.
Do not assume that another driver or mechanic has already checked the truck. The driver who operates the vehicle is responsible for confirming that it is safe.
2. Inspect the Engine Compartment
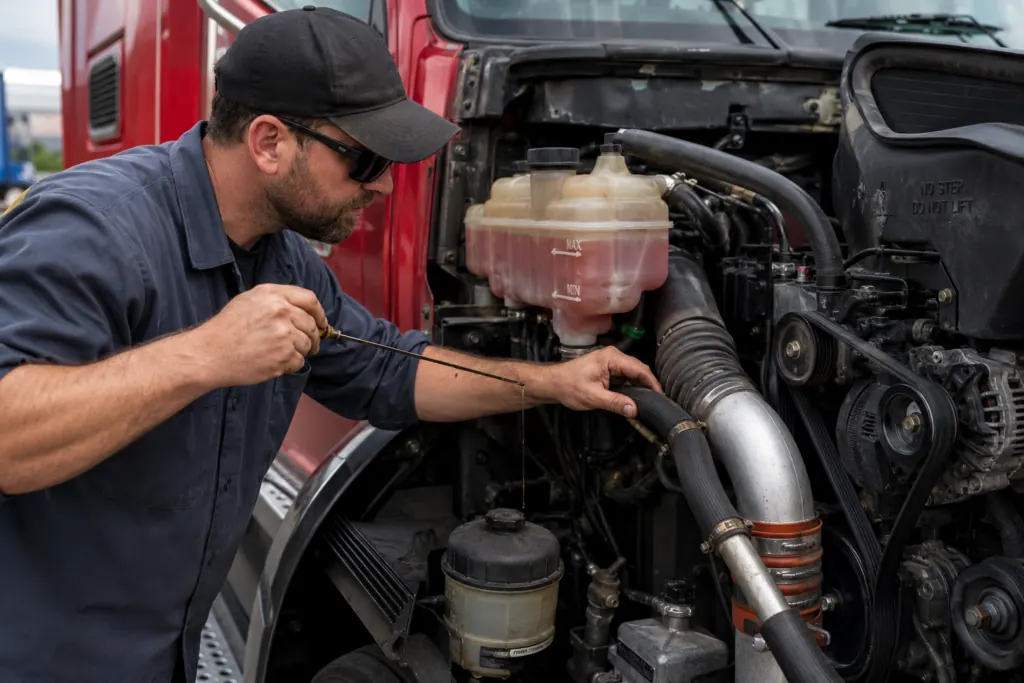
Open the hood and check the major engine components before starting the vehicle.
Fluids
Inspect the levels of:
- Engine oil;
- Coolant;
- Power-steering fluid;
- Windshield-washer fluid;
- Other fluids required by the vehicle manufacturer.
Look under the truck and around the engine for visible leaks. Fresh oil, coolant, fuel, or other fluid beneath the vehicle may indicate a serious problem.
Belts and Hoses
Check that belts are:
- Securely mounted;
- Not excessively loose;
- Free from cracks, fraying, or missing pieces.
Inspect hoses for cuts, swelling, leaks, and loose connections.
Engine Components
Examine accessible components such as:
- Alternator;
- Water pump;
- Air compressor;
- Power-steering pump;
- Wiring and electrical connections.
Parts should be securely mounted and show no obvious damage or leakage.
3. Check the Steering System
The steering system must be properly mounted and free from excessive looseness or damage.
Inspect visible components, including:
- Steering gearbox;
- Steering shaft;
- Pitman arm;
- Drag link;
- Tie rods;
- Steering knuckle;
- Connecting arms and joints.
Look for missing nuts, bolts, or cotter pins. Check for cracks, bends, leaks, and excessive movement.
Once inside the cab, verify that the steering wheel does not have excessive free play. Steering problems should be reported immediately because they can make the vehicle difficult or impossible to control.
4. Inspect the Suspension
Suspension components support the truck and help maintain vehicle stability.
Check:
- Leaf springs;
- Coil springs, when equipped;
- Airbags;
- Shock absorbers;
- Spring mounts;
- U-bolts;
- Torque rods;
- Suspension hangers.
Look for cracked, shifted, broken, or missing components. Air suspension bags should not be cut, leaking, or improperly inflated.
A broken spring, damaged mount, or loose U-bolt can affect vehicle handling and may result in the truck being placed out of service.
5. Examine the Brake System
Brake defects are among the most serious problems a commercial driver can discover.
Inspect the visible brake components on every axle:
- Brake hoses and lines;
- Brake chambers;
- Slack adjusters;
- Pushrods;
- Brake drums or rotors;
- Brake linings or pads;
- Mounting hardware.
Brake hoses should not be cracked, worn, cut, or leaking. Brake chambers must be securely mounted, and pushrods should not show excessive movement.
Drums and rotors must not have dangerous cracks or contamination. Brake linings should have sufficient thickness and must not be covered with oil or grease.
Federal rules require drivers to be satisfied that the service brakes, parking brake, steering system, lighting devices, tires, coupling equipment, and other listed components are in good working order before operating a CMV. These requirements are described in 49 CFR § 392.7.
6. Inspect Tires, Wheels, and Rims
Check every tire rather than inspecting only the tires that are easy to see.
Tires
Look for:
- Proper inflation;
- Adequate tread depth;
- Exposed fabric or steel cord;
- Cuts, bulges, and sidewall damage;
- Uneven or excessive wear;
- Objects stuck between dual tires;
- Contact between tires and vehicle components.
Use a tire-pressure gauge when necessary. A tire can appear properly inflated while still being dangerously underinflated.
Wheels and Rims
Inspect wheels for:
- Cracks;
- Bends;
- Illegal welding repairs;
- Rust trails around lug nuts;
- Missing or loose lug nuts;
- Elongated bolt holes;
- Leaking axle seals.
Rust trails or shiny metal around a lug nut may indicate movement and should not be ignored.
Hub Seals
Check that hub oil seals are not leaking. Oil or grease on the wheel, brake components, or tire may indicate a failed seal.
7. Check Lights and Reflective Equipment
All required lights should be clean, securely mounted, and working correctly.
Test:
- Low-beam headlights;
- High-beam headlights;
- Turn signals;
- Four-way flashers;
- Brake lights;
- Tail lights;
- Clearance lights;
- Identification lights;
- Side-marker lights;
- License-plate light.
Check reflectors and reflective tape for damage, dirt, or missing sections.
Use another person, a reflective surface, or the vehicle’s light-check system to confirm that rear lights are operating. Never assume a light works simply because the dashboard indicator is flashing.
8. Inspect the Coupling System
For a tractor-trailer combination, carefully inspect the connection between the tractor and trailer.
Check the:
- Fifth wheel;
- Mounting platform;
- Locking jaws;
- Release arm;
- Kingpin;
- Apron;
- Sliding fifth-wheel mechanism;
- Air lines;
- Electrical cable.
The fifth wheel should be properly lubricated, securely mounted, and free from dangerous cracks or missing hardware.
Confirm that the locking jaws are fully closed around the kingpin. There should be no visible gap between the trailer apron and the fifth-wheel plate.
Air and electrical lines should be properly connected, supported, and free from cuts, leaks, or excessive wear. They must not drag against the catwalk or become pinched during turns.
9. Walk Around the Tractor and Trailer
Complete a full walk-around inspection rather than examining the vehicle from one position.
Check both sides and the rear of the vehicle for:
- Body damage;
- Loose panels;
- Open compartment doors;
- Fluid leaks;
- Damaged lights;
- Missing reflective tape;
- Unsafe tires;
- Hanging air or electrical lines;
- Cargo securement problems.
Fuel and DEF Tanks
Fuel and diesel exhaust fluid tanks should be securely mounted. Caps must be tight, and there should be no visible leakage.
Exhaust System
Inspect visible exhaust components for:
- Loose mounts;
- Cracks;
- Holes;
- Leaks;
- Contact with fuel lines or electrical wiring.
Frame
Look for cracks, bends, broken cross members, or unauthorized welding. The frame must not have damage that could affect the structural integrity of the vehicle.
Doors and Steps
Make sure doors, handles, steps, and grab rails are secure. Storage compartments should be closed and latched.
10. Inspect the Trailer and Cargo
Check the trailer structure, including:
- Header board;
- Side panels;
- Cross members;
- Landing gear;
- Doors and hinges;
- Locks and seals;
- Rear impact guard;
- Tandem release mechanism;
- Sliding tandem pins.
Landing gear should be fully raised, and the crank handle must be secured.
Confirm that sliding tandem pins are fully engaged. Trailer doors must be closed and properly secured before departure.
Cargo Securement
Cargo must be distributed and secured so it cannot shift, leak, fall, or affect vehicle stability.
Inspect:
- Straps;
- Chains;
- Binders;
- Blocking and bracing;
- Tie-down points;
- Tarps;
- Seals;
- Load distribution.
Under 49 CFR § 392.9, drivers subject to the cargo-inspection rules must inspect the cargo and its securement devices within the first 50 miles of a trip. Additional inspections may be required after driving for three hours, traveling 150 miles, or changing duty status, whichever occurs first.
Some sealed loads and certain types of cargo are subject to different inspection rules. Drivers should follow the requirements applicable to their specific operation.
11. Inspect the Cab
Once the exterior inspection is complete, inspect the cab.
Check the:
- Windshield;
- Side windows;
- Mirrors;
- Windshield wipers;
- Heater and defroster;
- Seat and seat belt;
- Horn;
- Dashboard gauges;
- Warning indicators;
- Pedals;
- Parking brake controls.
Windows and mirrors should be clean and free from damage that obstructs the driver’s view. Mirrors must be properly adjusted before moving the vehicle.
Make sure loose objects inside the cab are secured. A bottle, tool, or electronic device can become a dangerous projectile during sudden braking.
12. Check Emergency Equipment
Commercial vehicles must carry the emergency equipment required for their operation.
Depending on the vehicle and cargo, this may include:
- A properly charged fire extinguisher;
- Three reflective warning triangles;
- Spare electrical fuses, unless the vehicle uses circuit breakers;
- Additional equipment required for hazardous materials;
- Tire chains when required by route or weather conditions.
Under 49 CFR § 392.8, emergency equipment must be inspected before the vehicle is driven.
Make sure the equipment is accessible, securely mounted, and ready for use.
13. Perform the In-Cab Brake Tests
The exact brake-test procedure depends on whether the truck has air, hydraulic, or another braking system. Follow the vehicle manufacturer’s instructions, company procedures, and your state CDL manual.
For an air-brake vehicle, the inspection commonly includes checking:
- Air-pressure buildup;
- Governor cut-out and cut-in;
- Applied-pressure leakage;
- Static air leakage;
- Low-air warning device;
- Spring-brake activation;
- Service-brake operation;
- Parking-brake operation.
The vehicle should be on level ground or properly secured before performing tests that require releasing the brakes.
Never drive if the air-pressure warning system fails, the pressure does not build correctly, air loss is excessive, or the brakes do not operate as expected.
14. Test the Service and Parking Brakes
Before entering traffic, move the truck slowly in a safe area and apply the service brake.
The vehicle should stop smoothly without:
- Pulling to one side;
- Unusual noises;
- Delayed braking;
- Excessive pedal travel;
- Steering-wheel vibration.
Test the tractor parking brake and trailer brake separately when appropriate. Each brake should hold the vehicle as required.
Report any brake problem immediately. Do not begin the trip until the defect has been properly evaluated and repaired.
IMAGE 4
Recommended image: Interior view of a driver checking dashboard gauges and air-brake pressure.
Alt text:
Commercial driver performing an air brake inspectionCaption: Air-pressure buildup, warning devices, leakage rates, and brake operation should be tested before driving.
Quick Pre-Trip Inspection Checklist
Before moving the vehicle, confirm that you have checked:
- Previous inspection reports and reported repairs;
- Engine oil, coolant, fluids, belts, and hoses;
- Steering components;
- Suspension components;
- Service brakes and parking brakes;
- Tires, wheels, rims, and hub seals;
- Headlights, signals, brake lights, and reflectors;
- Fifth wheel, kingpin, air lines, and electrical cable;
- Fuel tanks and exhaust system;
- Tractor and trailer frame;
- Trailer doors, landing gear, and tandem pins;
- Cargo distribution and securement;
- Windshield, mirrors, wipers, and defroster;
- Dashboard gauges and warning lights;
- Horn and seat belt;
- Fire extinguisher and warning triangles;
- Air-brake or hydraulic-brake systems;
- Service-brake and parking-brake operation.
This checklist is a general guide. It does not replace a company inspection procedure, vehicle manufacturer’s instructions, state CDL manual, or applicable regulations.
What Should You Do If You Find a Defect?
Do not ignore a problem because the vehicle still appears drivable.
When you discover a defect:
- Record or report it according to company procedures.
- Notify the dispatcher, maintenance department, or safety manager.
- Determine whether the defect affects safe operation.
- Do not operate the vehicle when doing so would be unsafe or illegal.
- Confirm that required repairs have been completed before departure.
A minor problem can become a serious failure after several hours of vibration, heat, braking, and highway travel.
FMCSA’s maintenance regulations require motor carriers to systematically inspect, repair, and maintain their vehicles. The complete federal requirements are available in 49 CFR Part 396.
Does a Pre-Trip Inspection Require a Written Report?
Federal regulations require drivers to perform the necessary pre-trip checks, but FMCSA guidance states that a separate written report of the pre-trip inspection performed under § 392.7 is not generally required.
However, drivers must still comply with applicable Driver Vehicle Inspection Report requirements, company policies, passenger-carrier rules, and state regulations. FMCSA explains the distinction in its official pre-trip inspection guidance.
Even when a written pre-trip form is not federally required, many carriers use electronic or paper checklists to document inspections and improve maintenance reporting.
Final Thoughts
A good pre-trip inspection should be systematic, unhurried, and completed in the same order every day. Developing a consistent routine reduces the chance of overlooking an important component.
Begin at the same point, work around the vehicle methodically, test the brakes, inspect the cargo, and resolve safety defects before entering public roads.
A few extra minutes spent inspecting a truck can prevent hours of roadside delay—and may prevent a serious accident. For commercial drivers, the pre-trip inspection is not only a regulatory responsibility. It is one of the most effective tools for protecting the driver, the vehicle, the cargo, and other road users.